Petticoat Party

March 2019

One perfect ballerina petticoat: priceless

When I was trying to figure out the right distribution of lengths for the layers of the petticoat, I thought that I just needed to make the difference between each layer roughly equal. So originally I set up the layers like this:

Screen Shot 2019-03-24 at 8.29.26 PM

Because of the interesting cutting mechanism / inaccuracies from the wing it approach to tulle, I ended up sewing each layer to the one above it 8 inches from the top of the smaller layer. The result didn’t seem long enough to start at the place I meant for it in the dress.

I had a strip of the cotton fabric that I was going to gather the top layer of tulle to and then attach to the dress. The waistband strip was almost exactly one yard and five yards would be too bulky when gathered directly to one. I was stuck for a while. Eventually I realized, I was going about the difference between the layer lengths all wrong, it wasn’t about making the difference between the layers roughly equal, it was about doubling and halving.

I added a two yard strip of the satiny lining fabric as a buffer layer between the 5 yards of tulle and the one yard cotton waistband. This solved both issues since the petticoat is now long enough, and the gathers add just the right amount of fluff.

I think the finished petticoat is my favorite part of the dress so far!

I tried it on on its own and it makes the perfect accompaniment to my **expert** sock twirls. I will be taking this back out of the dress post-wedding and using it for my ballet routine.

Tulle Techniques

February 2019

13 yards of Matte Tulle from Jo-Ann Fabrics (+ some strategic coupons) $13.00

Tulle is deceptively difficult to work with. It is consistently inexpensive to purchase and it looks so effortless in garments that you would think it is just as easy and breezy at the point of construction. The reality is that tulle is literally hard to pin down.

I learned a couple techniques the hard way while making the petticoat to poof out the dress:

1. The Dotted Line

Screen Shot 2019-03-24 at 8.16.10 PM

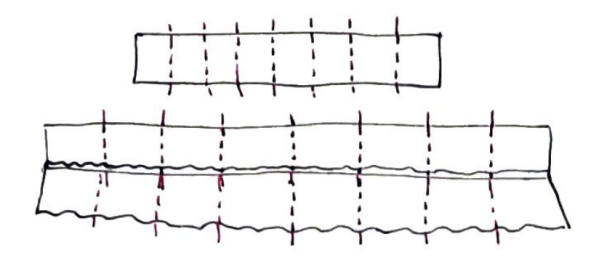
I couldn’t figure out a way to make markings on the tulle layers that would actually stay on the fabric for when I assembled the layers together using the usual methods. I ended up using the bright pink thread that I used before to outline the pattern pieces when I was nervous about cutting them out of the final fabric.

I used a running stitch to mark half of each section, and then half of those halves, and then half of those halves. This helped me line up each of the layers so that the ruffles were evenly distributed throughout.
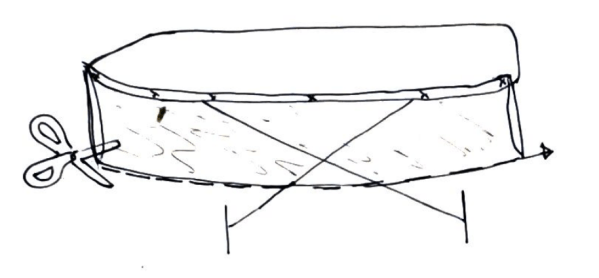
2. Double Down

Screen Shot 2019-03-24 at 8.16.42 PM

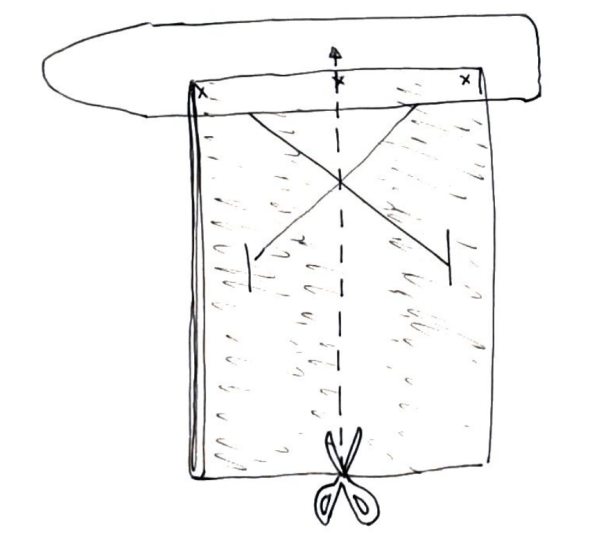
To cut the tulle strips in the first place, I used my ironing board as a counter weight and pinned the fabric to it. I was able to hold the fabric taught and cut down the middle. After the first three yards took forever this way, I folded the 10 yards I had left in half to be five yards and then 2.5 yards. This time I pinned the short side of the tulle to the ironing board and eyeballed where the center was to cut.

If I work with tulle again, I am going to buy the pre-cut 6 inch wide rolls instead. It would have saved me a lot of time and brainpower.

3. The Triple Pin

Screen Shot 2019-03-24 at 8.22.08 PM

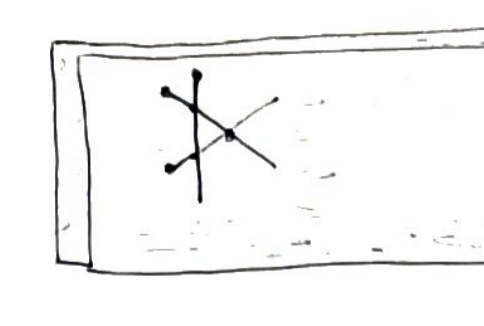
I had a lot of trouble with pins slipping right out of the tulle, until I started using three pins at a time in a tight triangle. This was enough overkill that the pins stayed in long enough for me to sew the layers together quickly.

4. Fold for Fluff

Screen Shot 2019-03-24 at 8.22.18 PM

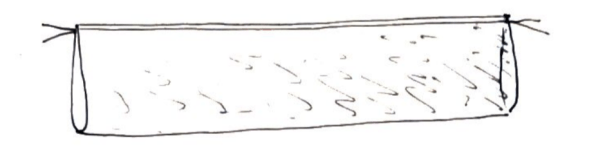
The tulle was a little too soft to add body under the heavy satin of the top layer, so I folded each strip in half to help it function like a heavier tulle.

I sewed each layer along the edge to keep the fold together since pinning tulle is an ephemeral art. This was mostly a good idea but I think I finished this task too late at night because two of the three tulle layers were kind of wonky and were hard to cut cleanly even though they were sewed together. I can’t tell from the finished petticoat though.

5. The Strongest Thread You’ve Got

Screen Shot 2019-03-24 at 8.22.26 PM

The thread on my machine was snapping every few inches in the beginning. I think the needle was more prone to misstep on the netting, and there was nothing to stop the two threads from getting tangled around the needle. I swapped the bobbin thread and the top thread for Coat’s extra strong thread and didn’t have any more issues. It was a good compromise from wasting a lot of the silk thread, or snapping all of the all-purpose.

6. Let Go of Perfectionism

Screen Shot 2019-03-24 at 8.16.32 PM

The tulle was not down for me measuring and double checking and was really frustrating to work with when I used the careful approach I took with the other fabrics. When I decided to wing it and eyeball a few things, I was able to work much faster and keep the petticoat more orderly-looking then when I was hyper-focused on that goal.

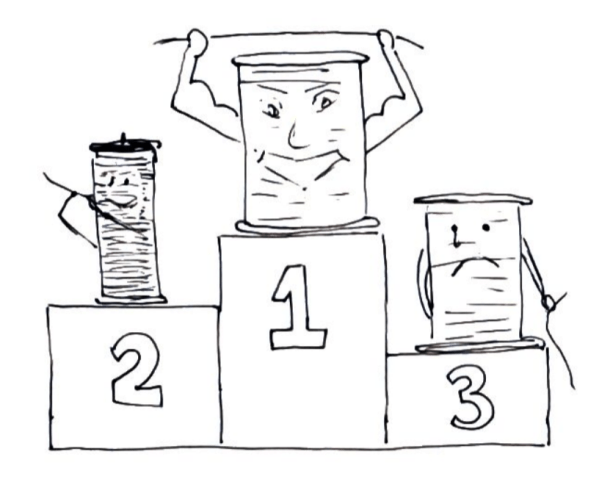
Final Score: Tulle: 12    Nicole: 1 petticoat

Toile-ing Away

The main reason sewing has been my weakest craft has been for lack of patience. 16 seasons of Project Runway gave me the illusion that the dressmaking process was as follows:

  1. Gather scraps of fabric / garbage / spare zippers
  2. Stare at dress form
  3. Snap fingers with idea
  4. Make it work! (in under 24 hours)

Every time I just zip something through a sewing machine it has ended up an unwearable mess, or a bunch of pattern pieces that haven’t fit, or the worst case scenario: pattern pieces that I am afraid to cut into because how do you know which line to follow?

This time around, I did enough research to know that I should make at least one toile, a practice version of the dress in muslin to make sure the dress both looks good and fits. I ended up making three versions of practice dresses. For the first, I copied the pattern exactly, with a lot of buffer room around the seams. I drew all over this version and sharpied the names of the pattern pieces on.

Princess seams felt impossible at the beginning of this process and the first go round I was barely able to stitch them by hand. It just never feels like you can get the convex curve on one piece to line up exactly with the concave piece on the side front. For the second one, I cut many little notches in the princess seams to help them lay flat.

I installed a zipper inside out so that the fabric could hold itself up during pinning. Alison came to my rescue to help pin the parts my arm couldn’t reach.

I spent a lot of time hand sewing to teach myself a lesson about patience, or rather to set a slow-ish pace so that I wouldn’t rush right in and mess it up. I think this paid off because I was able to hand sew first some of the seams with the final fabric that otherwise would have gone weird under the machine pedal.

It was so much fun to try on the second toile that I had some paralysis about moving on to the real thing.

Semi-Homemade Patterning

January 2018

Style Sewing Pattern 2531 Ladies Dress Evening Halter Misses size 6-16: $10.75 on Etsy

I figured it would be too hard to start patterning from scratch, since I have yet to draft a dress pattern, and am just learning how to adjust clothes for fit. I am also operating on blind faith that this pattern experiment would not wind up like every other pattern piece that is lurking unfinished in my fabric bin. Fingers crossed, I looked for wedding dress patterns that similar to the dresses I liked in the stores. I am a fan of beaded overlays, swishy skirts that aren’t full ballgowns, a-line silhouettes, and a variety of necklines adjacent to the v-neck.

I was pumped when I found this pattern on Etsy because a halter-top dress seemed perfect for a summer wedding, and I could see it looking like an elevated version of my favorite prom dress.

This pattern is from the nineties and I am from the nineties, therefore if I can be timeless and elegant, then this dress will be as well… only without the accessory sleeves. The plan is to start with this pattern and make tweaks to taste.